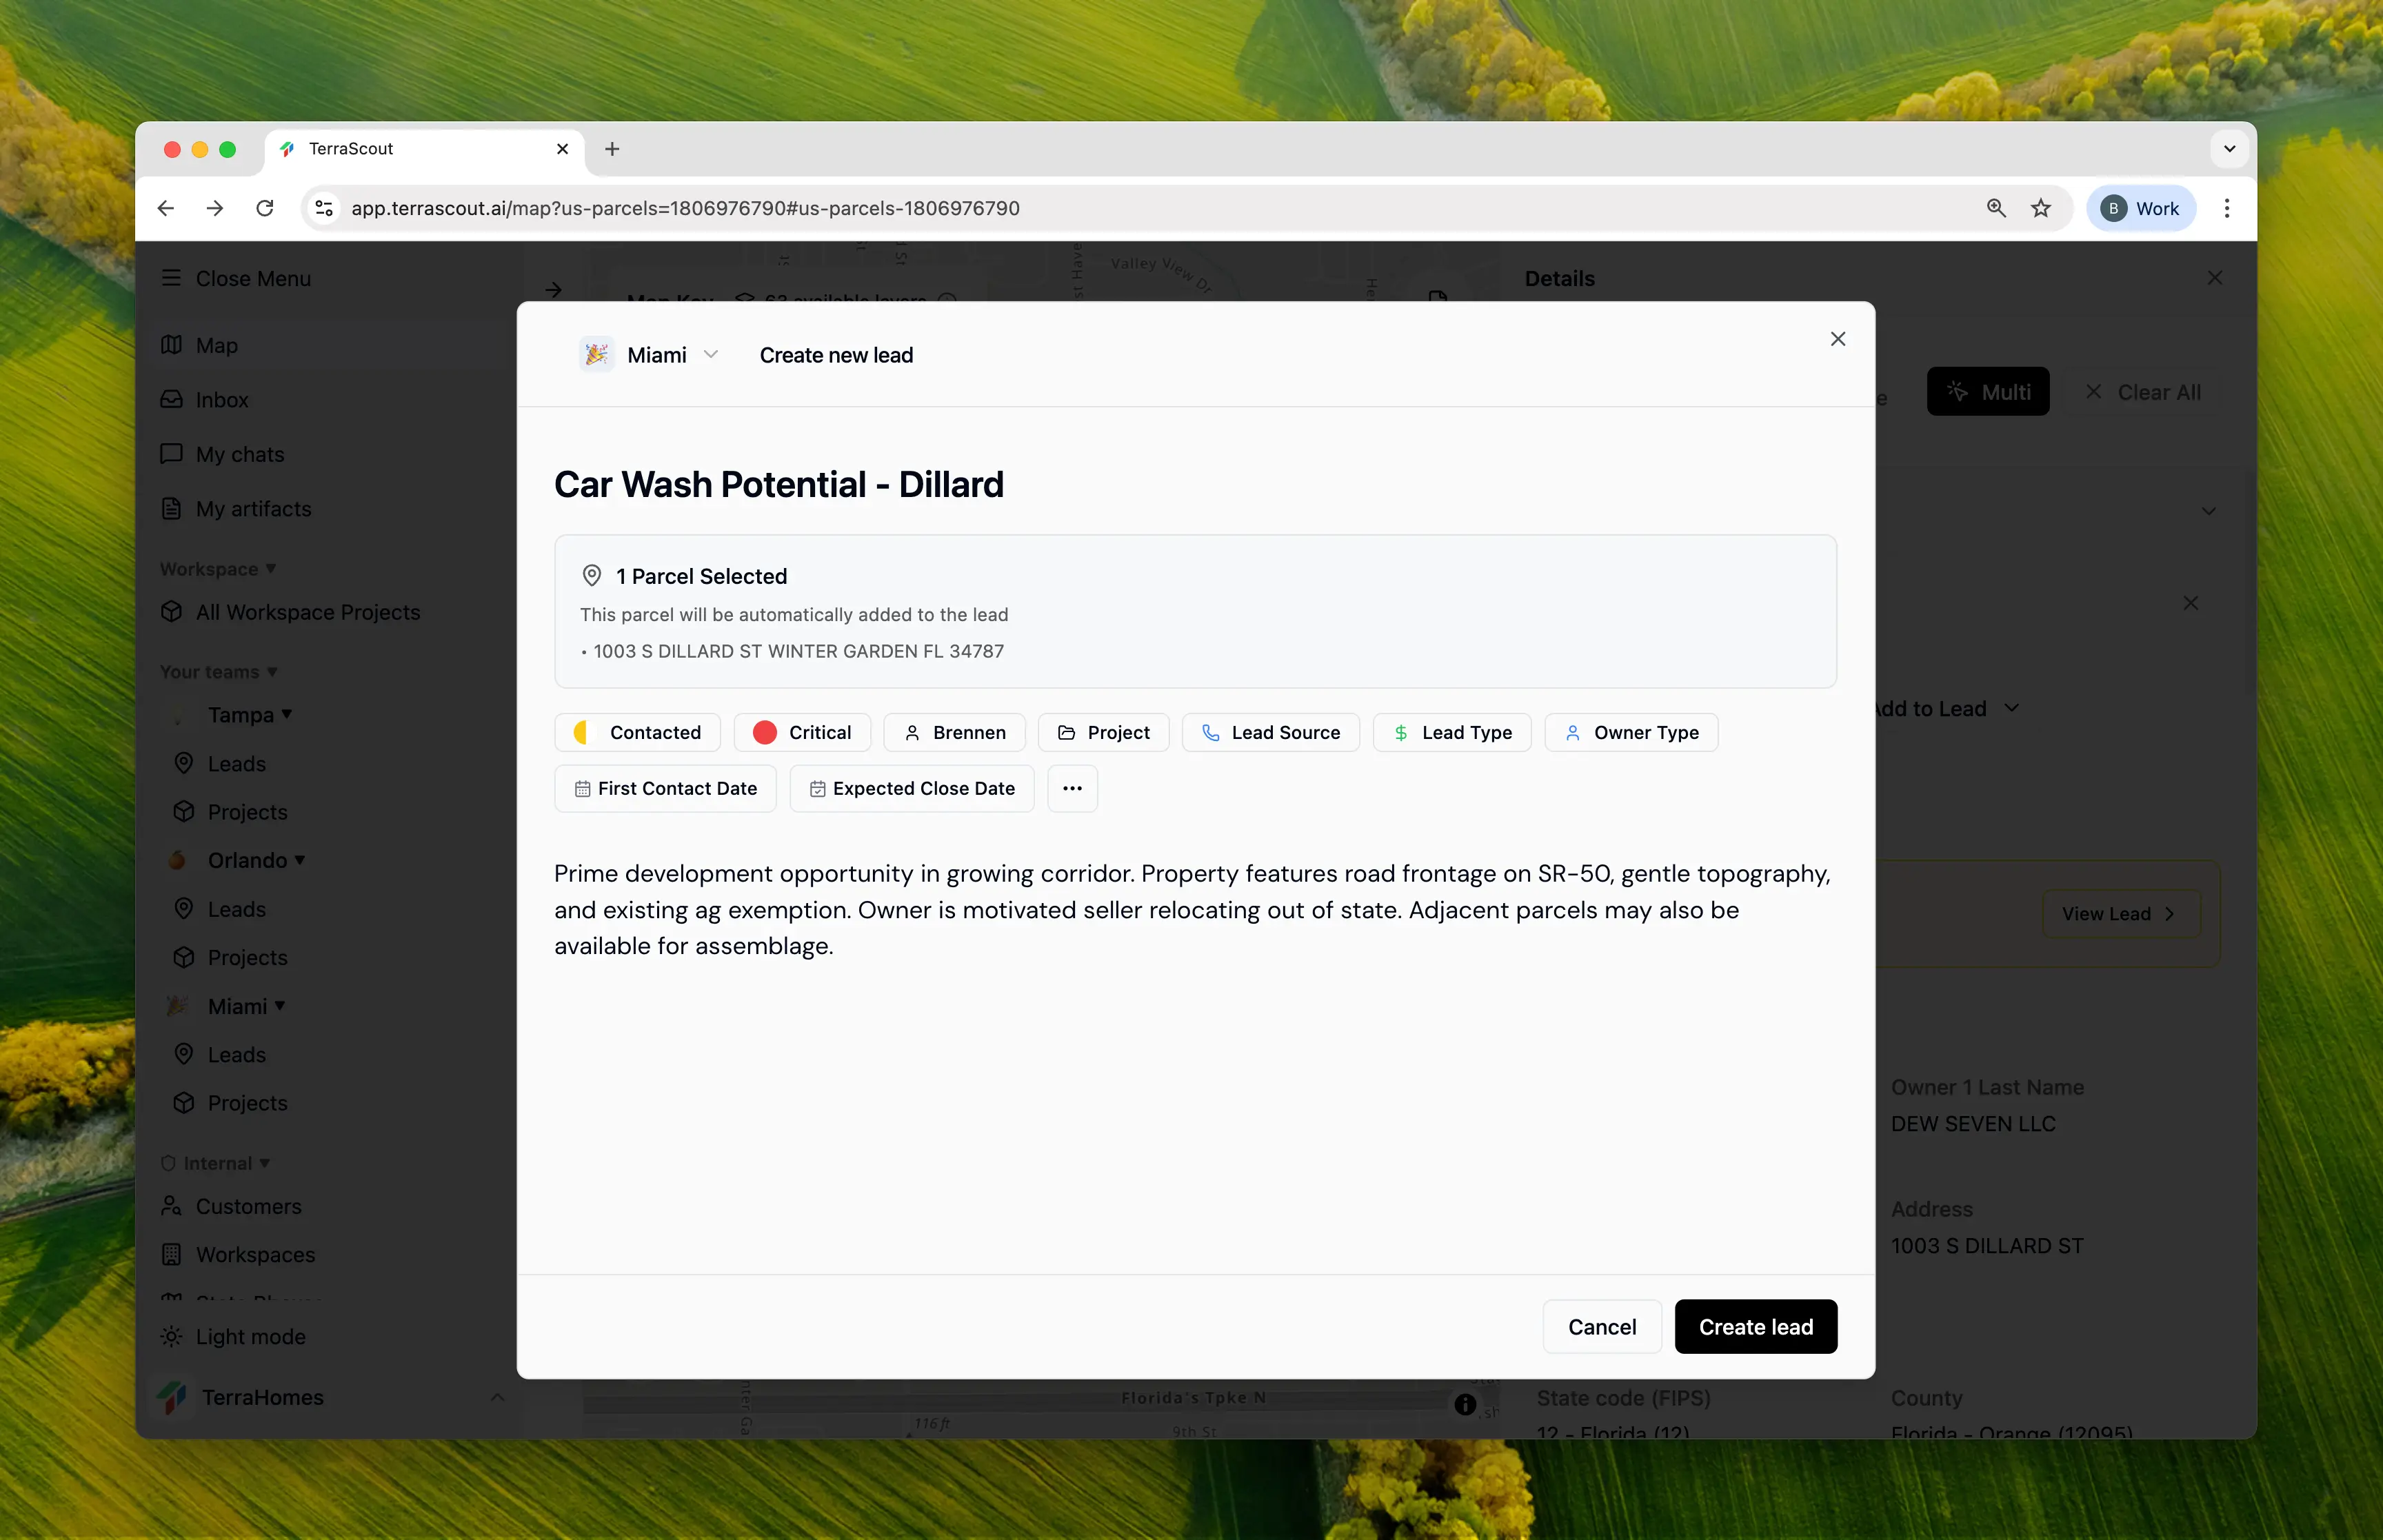
Creating a Lead from the Map
The most common way to create a lead:- Navigate to the map and find a property
- Click on a parcel to select it
- Click Create Lead in the parcel popup
- Fill in the lead details
- Submit to create the lead
Required Fields
- Title - Give your lead a descriptive name
- Team - Assign to a team (auto-selected if you only have one)
What You Can Add
When creating a lead, you can fill in as much or as little as you want. Here’s what’s available:- Title & Description — Name your lead and add notes
- Status — Track where it is in your pipeline (New, Contacted, Negotiating, etc.)
- Priority — Flag important opportunities
- Source & Type — Record how you found it and what kind of deal it is
- Owner Type — Individual, LLC, Trust, etc.
- Financials — Asking price, your estimated value, and offer amount
- Key Dates — First contact, expected close, contract date, closing date
- Assignment — Who’s responsible for this lead
- Project — Optionally link it to a project
Associated Parcels
When creating a lead from the map, selected parcels are automatically associated. The dialog shows:- Number of parcels
- Total acreage
- Parcel previews
After Creation
Once created:- You’re automatically subscribed to the lead
- If assigned, the assignee is also subscribed
- The lead appears in your leads list and any associated project
- Activity tracking begins immediately
Tips for Effective Leads
Descriptive Titles
Use clear titles like “123 Main St - 5 Acre Residential” rather than generic names.
Capture Source
Always record how you found the lead to track which channels perform best.
Add Initial Notes
Include any research or context in the description while it’s fresh.
Set Priority Early
Prioritize leads immediately so your team knows what to focus on.