
Connect Ploti to Claude
Connect Ploti once, then bring parcel data, ordinance research, and maps into Claude conversations on web or desktop. Before you start: Your Claude account must allow custom connectors. On Team and Enterprise plans, an owner must first add Ploti as an organization connector. See Anthropic’s custom connector guide for current availability.1
Find Connectors
Open Claude Settings and select Connectors. On Team and Enterprise plans, an owner first adds Ploti from organization settings; each member then connects their own account.
2
Add Ploti
Select Add, then Add custom connector. Name it
Ploti and paste the connector URL below. If advanced OAuth fields appear, leave them empty; Ploti configures authentication for you.Connector URL
3
Approve the connection
Select Continue to add the connector, then select Connect if prompted. Complete the Ploti sign-in and authorization in your browser, choosing the workspace you want to use. This works with free and paid Ploti accounts.
4
Try it in a conversation
Start a new conversation, open the tools menu beside the message box, and make sure Ploti is enabled. Then try:
Use Ploti to find vacant parcels over 10 acres near Tampa, Florida, and show the results on a map.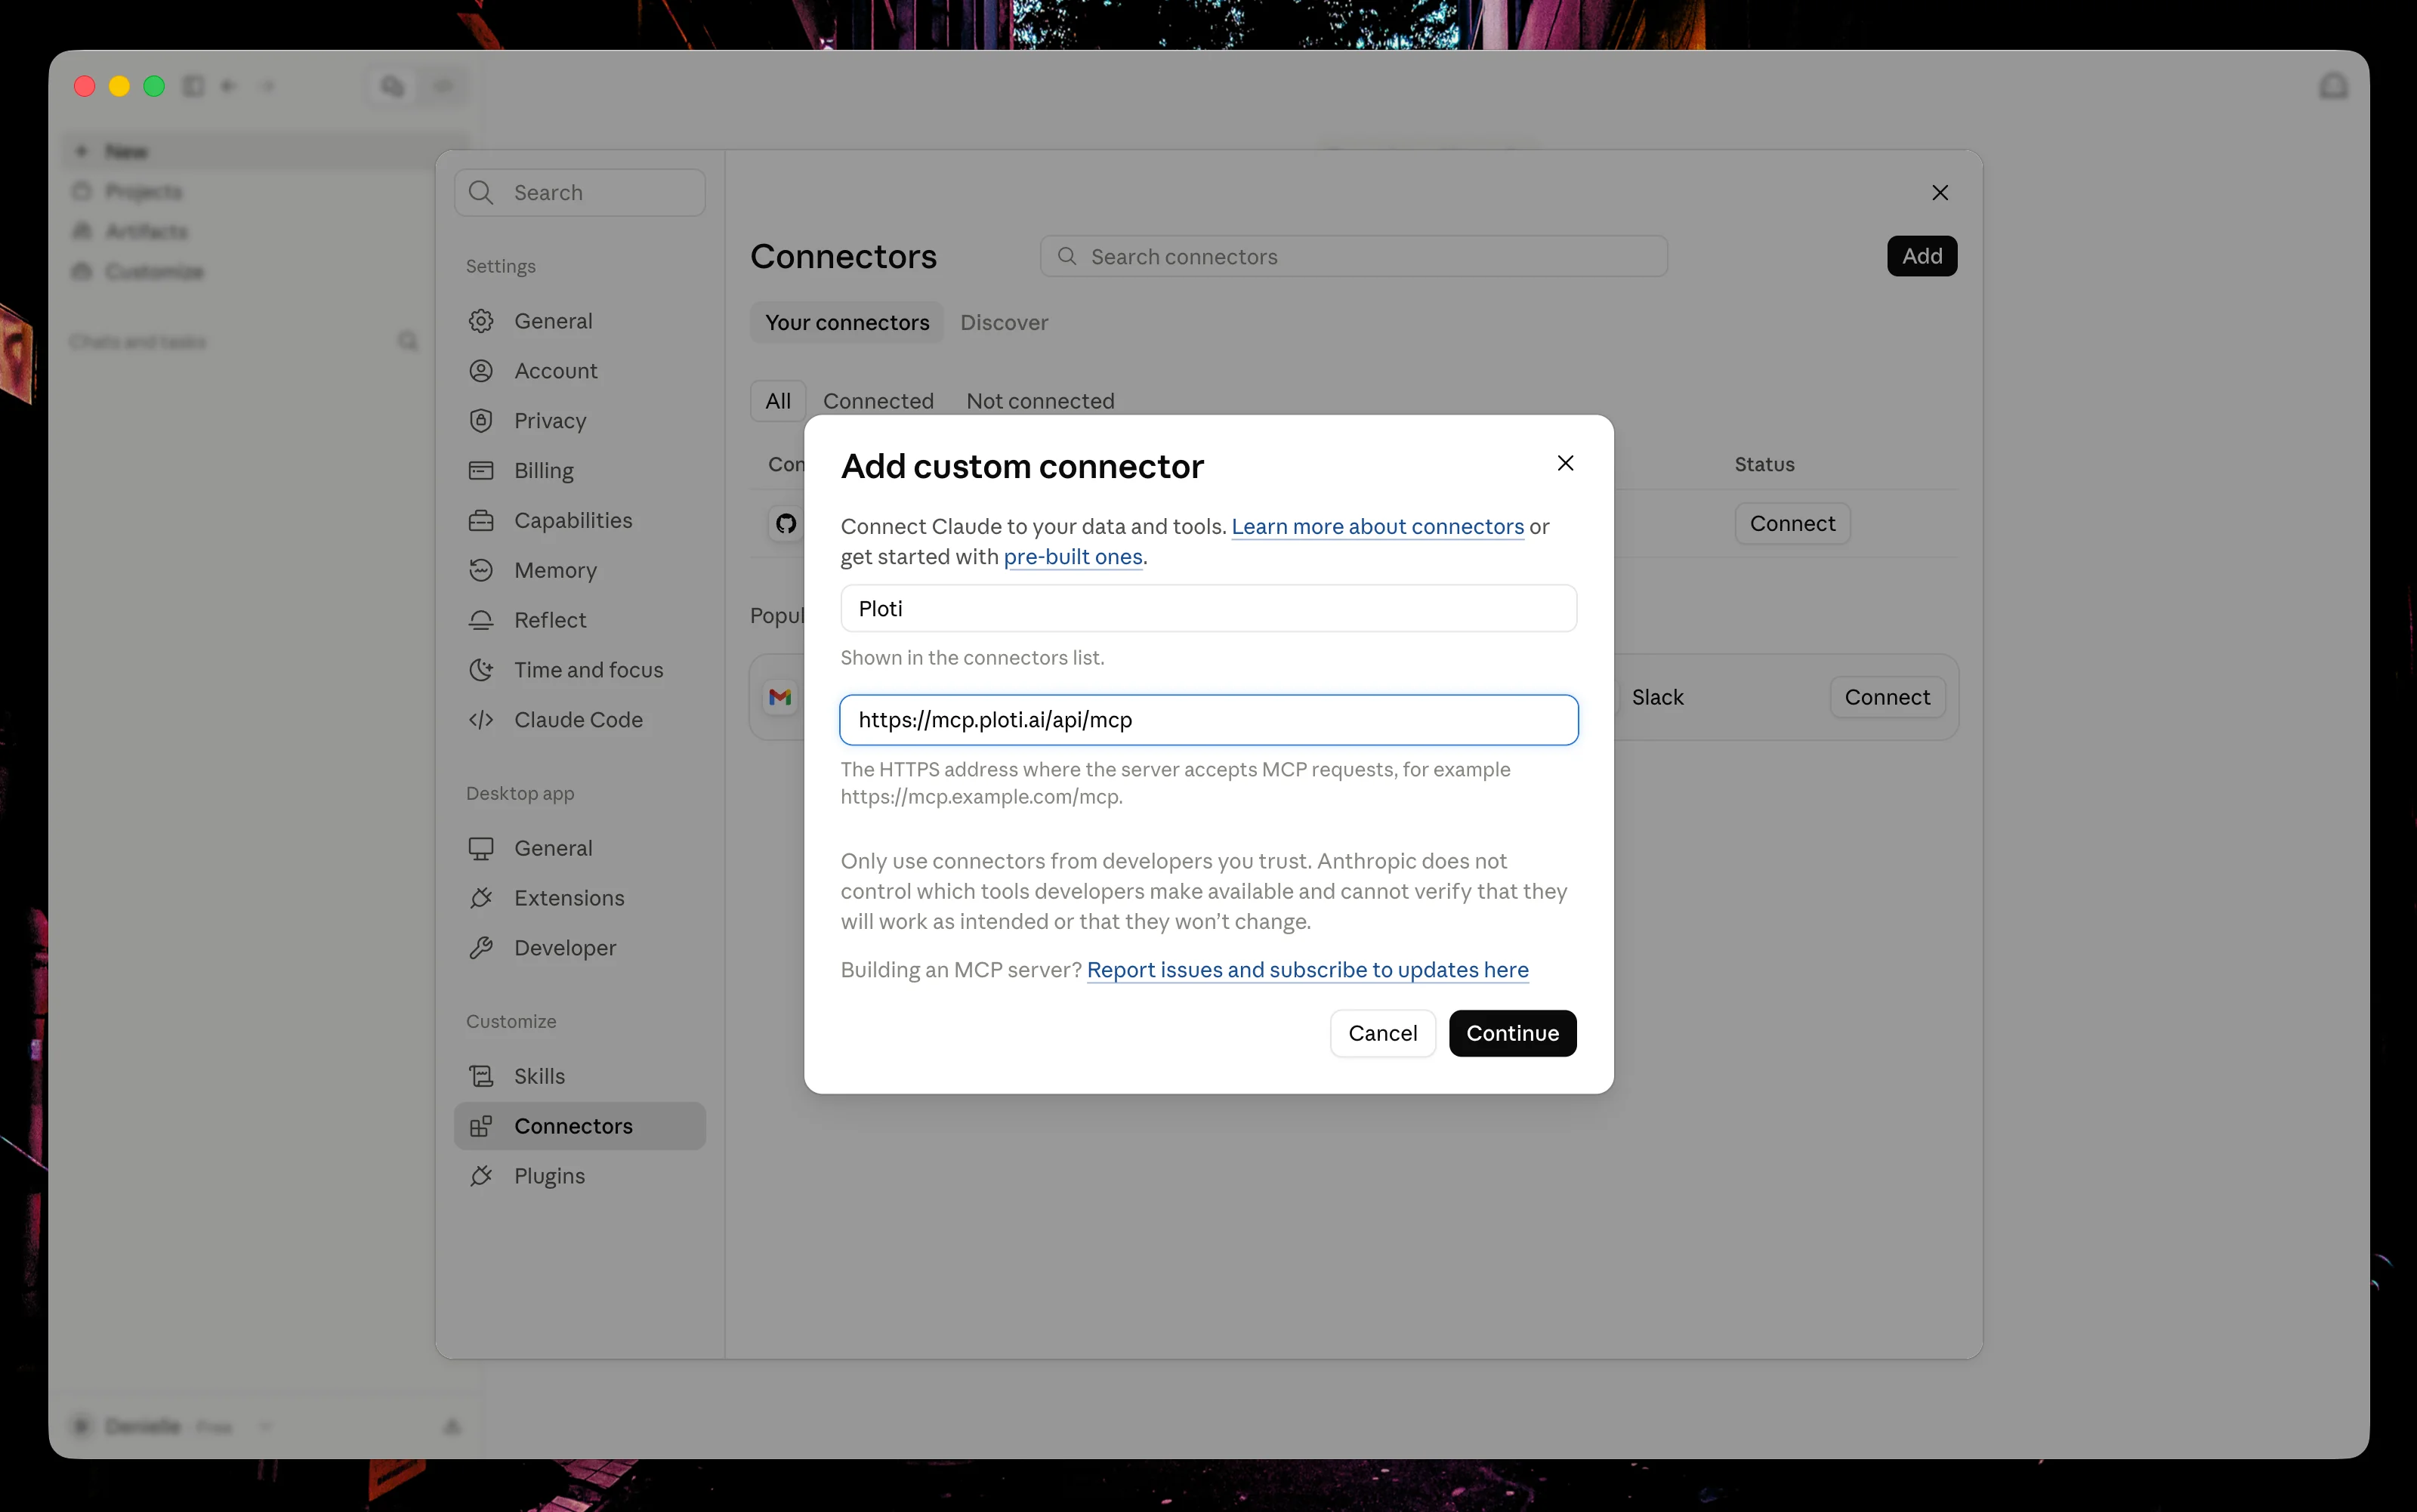
Add Ploti as a custom connector in Claude Desktop, then select Continue.
Connection troubleshooting
Fix authentication, expired sessions, missing tools, and result display
issues.