> ## Documentation Index
> Fetch the complete documentation index at: https://terrascout.ai/docs/llms.txt
> Use this file to discover all available pages before exploring further.
# Connect Ploti to ChatGPT
> Connect Ploti's MCP server on the ChatGPT website using developer mode
# Connect Ploti to ChatGPT
Connect Ploti's MCP server through ChatGPT Plugins so ChatGPT can look up properties, research ordinances, and return maps and tables directly in a conversation.
Follow these steps on [chatgpt.com](https://chatgpt.com) in a web browser.
This guide covers the website's MCP setup flow, not the native ChatGPT Mac
app. Menu names and available settings can differ between those surfaces.
**Before you start:** Your ChatGPT account and workspace must allow developer mode. If the setting is unavailable, check with your workspace administrator. See [OpenAI's connection and testing guide](https://developers.openai.com/plugins/deploy/connect-chatgpt) for current requirements.
Visit [chatgpt.com](https://chatgpt.com) and sign in to the account and workspace where you want to connect Ploti. Complete the setup and first test in this browser.
On the ChatGPT website, open **Settings**, select **Security and login**, and turn on **Developer mode**. Complete any confirmation ChatGPT presents. If the setting is missing, first confirm you are using the website; availability also depends on your account and workspace policy.
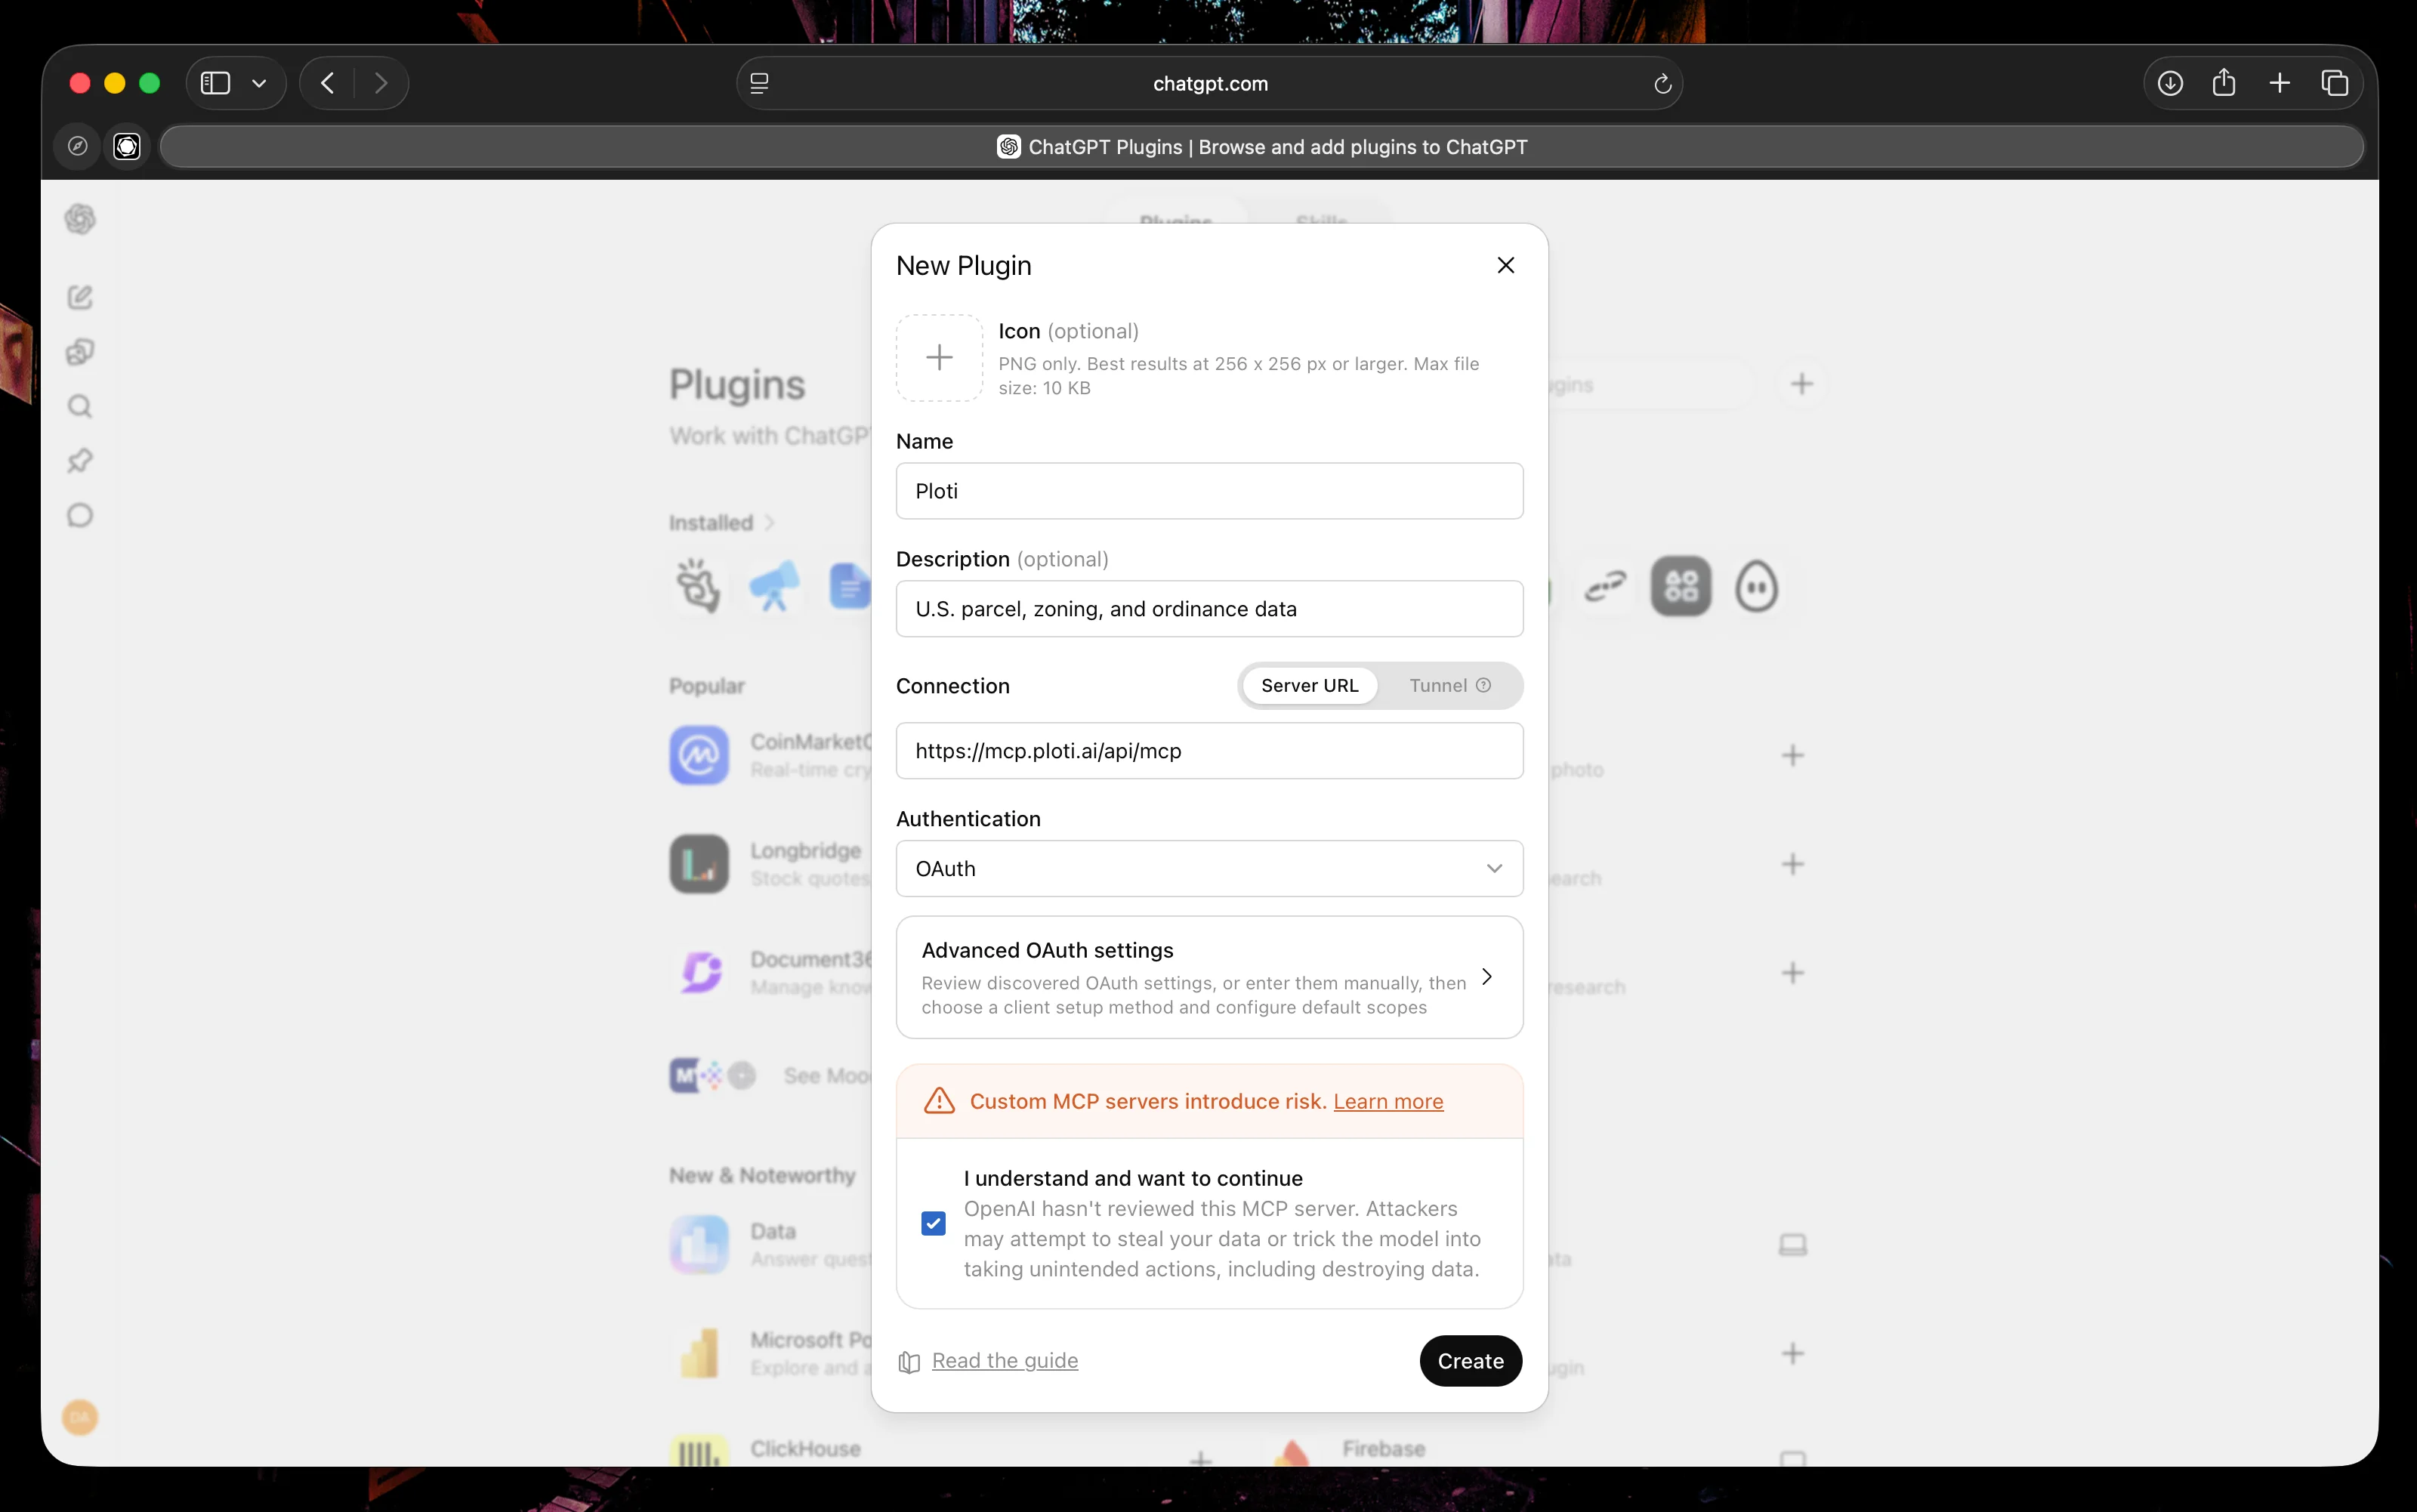
Open [ChatGPT Plugins](https://chatgpt.com/plugins) and select the **+** or **Add** button. Open the option for adding an MCP server connection. The **New Plugin** form asks for a name, description, and **Connection** details.
Name it `Ploti`, add a description such as `U.S. parcel, zoning, and ordinance data`, select **Server URL** under **Connection**, and enter this public HTTPS endpoint:
```text MCP server URL theme={null}
https://mcp.ploti.ai/api/mcp
```
Set **Authentication** to **OAuth**. Review the custom MCP server notice, select **I understand and want to continue** if you agree, then select **Create**.
If **Create plugin** opens a conversation with Plugin Creator, return to
Plugins. That workflow builds a plugin; this guide connects Ploti's
existing MCP server. Confirm developer mode is enabled before looking
for the MCP connection option.
Complete Ploti's OAuth sign-in in your browser, choose the workspace you want to use, and approve the connection. Leave optional client ID and client secret fields empty.
Return to the Ploti connection in Plugins and review the tools and metadata discovered from the server. Resolve any connection or authentication error before starting a chat.
Start a new chat on the website and add the Ploti MCP connection from the tools menu. Try: `Use Ploti to compare parcels between 5 and 20 acres in Winter Garden, Florida, and return a map and table.`
 If Ploti's tools change, open its connection in Plugins, select **Refresh**, and start a new conversation. For current setup and testing instructions, see [OpenAI's connection and testing guide](https://developers.openai.com/plugins/deploy/connect-chatgpt).
ChatGPT may ask for confirmation before tools that run code or create files.
Review the proposed action and inputs before approving it.
If Ploti's tools change, open its connection in Plugins, select **Refresh**, and start a new conversation. For current setup and testing instructions, see [OpenAI's connection and testing guide](https://developers.openai.com/plugins/deploy/connect-chatgpt).
ChatGPT may ask for confirmation before tools that run code or create files.
Review the proposed action and inputs before approving it.